
Front view:


Top view:
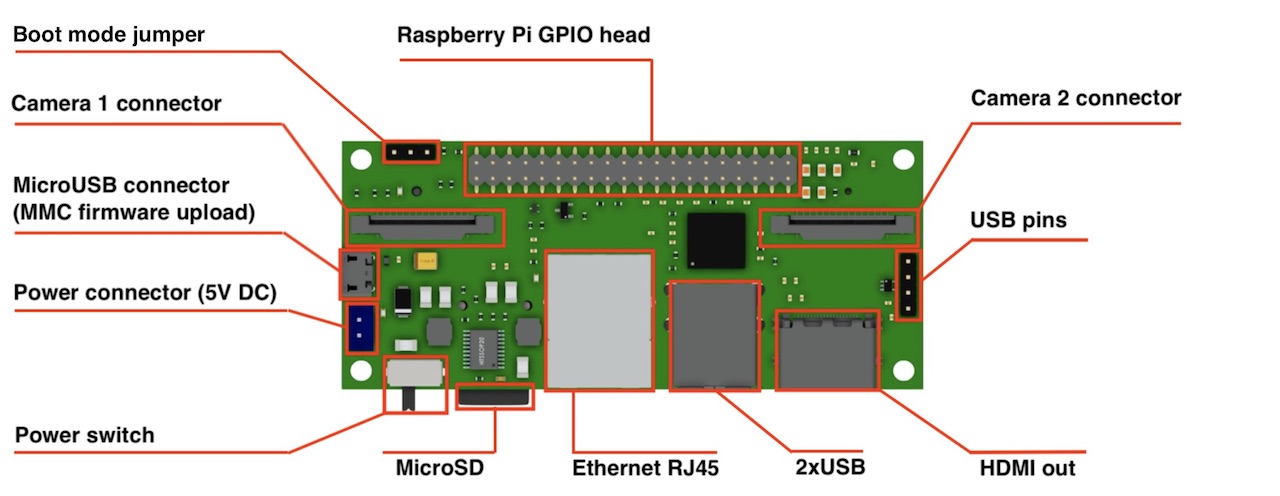

Dimensions: 90x40 mm
Camera: 2 x CSI 15 lanes cable
GPIO: 40 classic Raspberry PI GPIO
USB: 2 x USB type A, 1 USB on a pins
Ethernet: RJ45
Storage: Micro SD (for CM3 Lite)
Monitor: HDMI out
Power: 5V DC
Supported Raspberry Pi: Raspberry Pi Compute Module 3, Raspberry Pi CM 3 Lite, Raspberry Pi CM 1
Supported cameras: Raspberry Pi camera OV5647, Raspberry Pi camera Sony IMX 237, HDMI In (single mode)
Firmware update: MicroUSB connector
Power switch: Yes! No more connect-disconnect MicroUSB cable for power reboot!
Status: we have fully tested ready-to-production samples
That’s all that I wanted to cover today. If you have any questions I will be glad to answer.
Project website is http://stereopi.com
https://www.crowdsupply.com/virt2real/stereopi
------
StereoPi - companion computer on Raspberry Pi with stereo video support
https://diydrones.com/profiles/blogs/stereopi-companion-computer-on-raspberry-pi-with-stereo-video-1
Compute Module 3 for playing with stereo video and OpenCV. It could be interesting for those who study computer vision or make drones and robots (3D FPV).
It works with a stock Raspbian, you only need to put a dtblob.bin file to a boot partition for enabling second camera. It means you can use raspivid, raspistill and other traditional tools for work with pictures and video.
JFYI stereo mode supported in Raspbian from 2014, you can read implementation story on Raspberry forum.
Before diving into the technical details let me show you some real work examples.
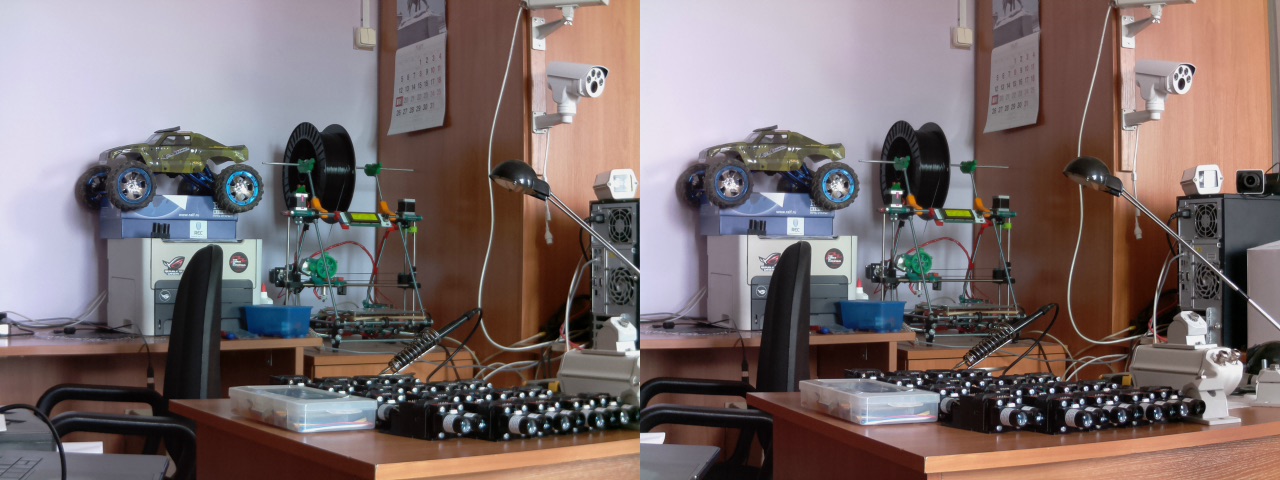
1. Capture image:
raspistill -3d sbs -w 1280 -h 480 -o 1.jpg
and you get this:
2. Capture video:
raspivid -3d sbs -w 1280 -h 480 -o 1.h264
and you get this:
You can download original captured video fragment (converted to mp4) here.
3. Using Python and OpenCV you can experiment with depth map:
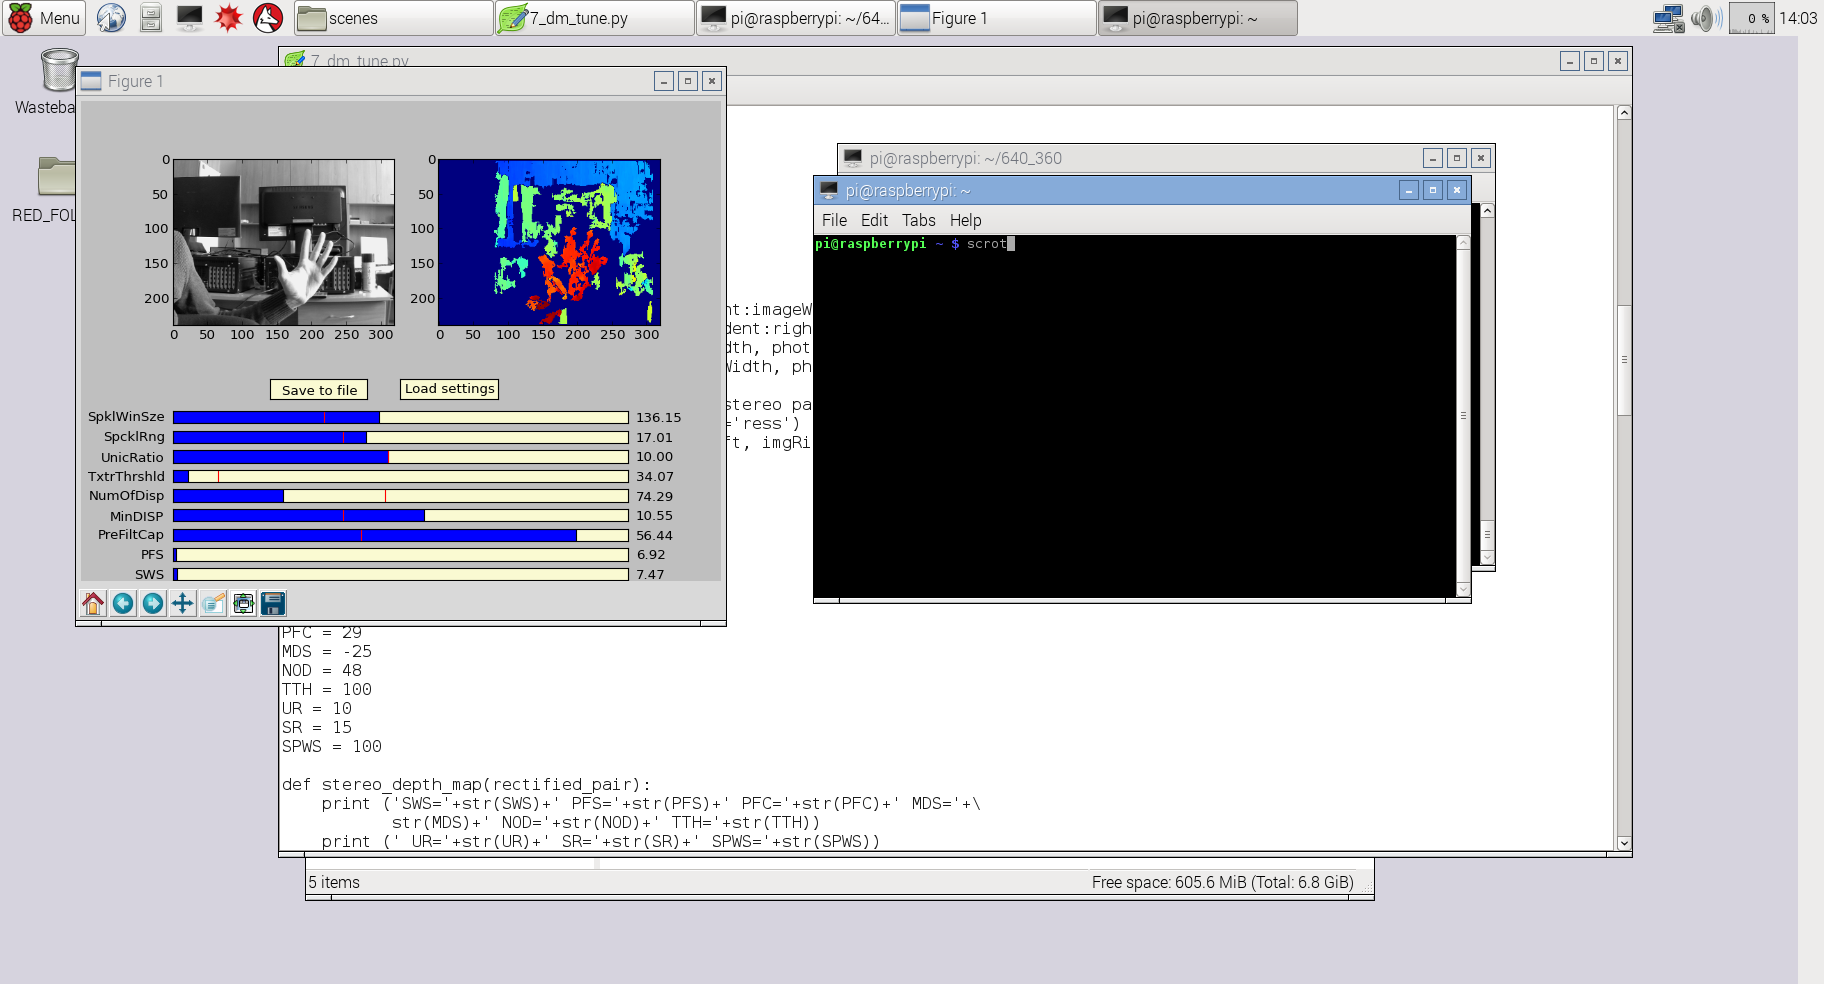
For this example I used slightly modified code from my previous project 3Dberry (https://github.com/realizator/3dberry-turorial)
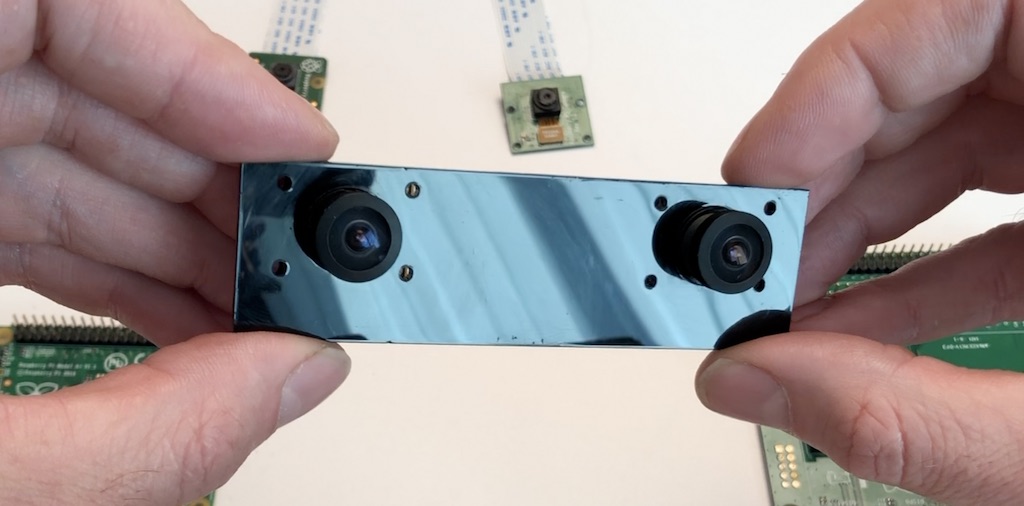
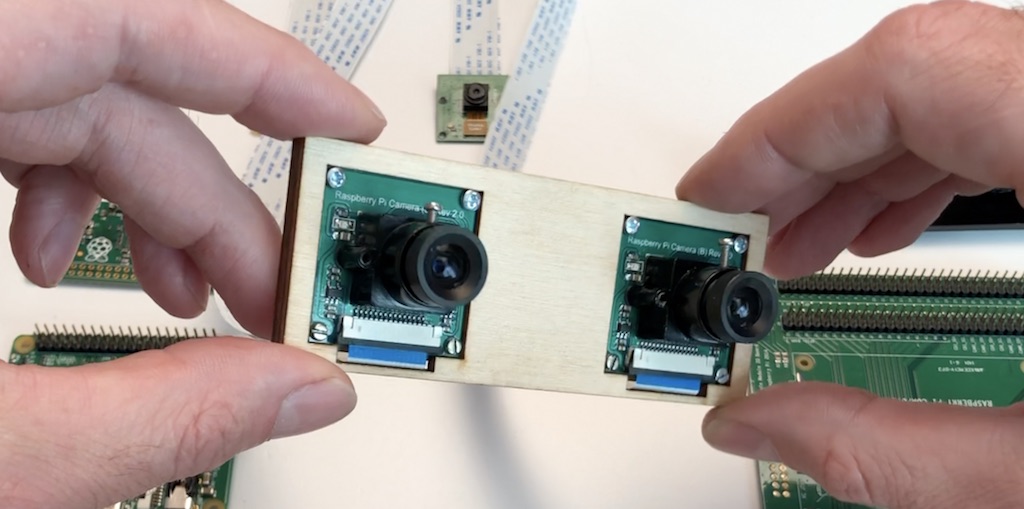
I used this pair of cameras for taking the pictures in examples above:

SLP (StereoPi Livestream Playground) Raspbian Image
https://github.com/realizator
https://github.com/realizator/StereoVision
https://github.com/realizator/stereopi-fisheye-robot
https://github.com/search?p=3&q=stereopi&type=Repositories

No comments:
Post a Comment